How to Change Spreader or Sprayer Tires Safely (Step-by-Step)
Why Combine & Sprayer Tires Are Dangerous to Handle
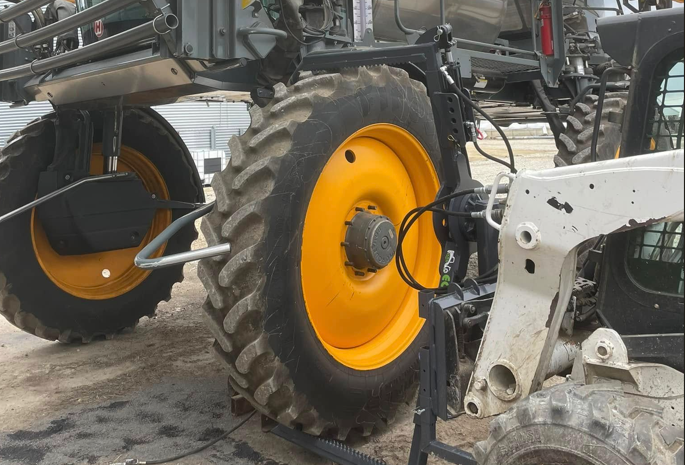
Changing combine or sprayer tires is one of those jobs that looks simple until you’re in it. Massive weight, awkward angles, and limited clearance around fenders turn it into a slow and risky process fast. This guide walks through how to do it safely and efficiently, and where the right equipment makes a major difference.
Combine and sprayer tires are extremely heavy, often weighing well over 1,000 lbs, which makes them difficult to control once they start moving. The tight clearance around fenders creates awkward positioning that makes alignment frustrating and time consuming. On top of that, these tires are naturally unstable and want to roll or tip if they are not fully supported. Trying to handle them manually adds serious risk, including back injuries, crushed hands, and uncontrolled drops. What seems like a simple tire change can quickly turn into a dangerous situation without the right equipment controlling the load.
If you’ve ever wrestled one into place by hand, you already know how fast things can go wrong.
Equipment You Need
- Skid steer with a tire handler attachment
Example: ECHO X3 Tire Handler
- Heavy-duty jack with integrated safety stand
Example: ECHO Jacks with Safety Stand
- Flat, stable working surface
- Impact & sockets
Step-by-Step: Safe Tire Change Process
1. Position the Machine
- Park on flat, solid ground
- Set parking brake and shut off engine
- Chock wheels if needed
2. Lift and Secure with the Jack
- Position the jack under the correct lift point
- Raise the machine slowly
- Engage the integrated safety stand before doing anything else
This is where the ECHO Jack stands out. The safety stand supports the load directly, not just relying on a hydraulic cylinder.
3. Remove Lug Nuts
- Break loose lug nuts before full removal if needed
- Remove completely once the tire is off the ground
4. Grab the Tire with the Handler
- Use the skid steer and tire handler to clamp the tire securely
- Keep full control of the tire before pulling it off
5. Remove the Tire
- Pull straight back from the hub
- Keep the tire stable and balanced as it comes off
6. Position the Replacement Tire
- Pick up the new tire with the handler
- Drive it into position in front of the hub
- Use the handler’s control to fine-tune alignment
7. Align the Studs
- Adjust height and angle using the handler
- Rotate slightly as needed to line up holes with studs
This is where a rotating handler saves a massive amount of time.
8. Install and Tighten
- Slide the tire onto the studs
- Hand-thread lug nuts first
- Tighten in a star pattern
9. Lower the Machine Safely
- Remove the safety stand
- Lower slowly with the jack
- Final torque on lug nuts once grounded
Where the Right Equipment Changes Everything
With a tire handler:
- One operator controls the entire tire
- Precise positioning and alignment
- No manual lifting
With a safety stand jack:
- Load is mechanically supported
- Safer than standard jack tubes with pin holes
- More confidence working underneath
Final Take
You can change combine and sprayer tires the old way, but it’s slower, harder, and a lot more dangerous.
Using a skid steer tire handler paired with a jack that has a true safety stand turns it into a controlled, repeatable process that one operator can handle.
If you’re doing this as a professional tire shop, or even one time a year, the efficiency and safety gains aren’t small. They’re immediate.
ECHO Eqpt Articles